Thirukarthigai Deepam is on 6th December 2022 click here for recipes

Search Recipes in Sara's Corner

Showing posts with label HEALTH. Show all posts

Thursday, November 21, 2019

Karuvepillai Kulambu | Curry leaves gravy!

Karuvepilai Kulambu is curry leaves gravy, sidedish for rice or dosa. Its healthy and tasty as it has iron content.😋


Ingredients
Curry leaves/Karuvepilai - 2 cups(1 big bunch)
wash, pat dry and take only leaves.

For grinding
Gingely oil - 1 tablespoon
Daniya/Coriander seeds - 2 tablespoons
Channa dal/kadalai paruppu - 1 tablespoons
Fenugreek seeds/venthayam - 1 teaspoon
Black pepper - 1 tablespoon
Dry red chilli - 6 nos
Asafotida/peringayam - 1 teaspoon
Garlic pods (few) optional but tastes good when added.

For making kulambu
Gingely oil - 4 tablespoon
Mustard - 1 teaspoon
Dry red chilli - 4 nos
Toor dal/ Tuvaram paruppu - 1 teaspoon
Fenugreek seeds/venthayam - 1 teaspoon
Tamarind water/Puli thanni - 2 cups thick.
Turmeric /manja podi - 1 teaspoon
Sambar powder - 2 tablespoons
Jaggery/vellam -  small piece(optional)
Salt as per taste

Preparation Method

- Heat a thick bottom kadai, add for grinding ingredients except curry leaves mentioned above and fry till slight brown, transfer to a plate to cool. Then saute and make curry leaves also crisp, Keep aside. Grind the masala first in mixie and then add curry leaves can add water and make fine paste.
- Again heat the same kadai, add, gingely oil(sesame oil), add mustard wait till it splutters, add tuvar dal, fenugreek seeds, dry chilli, garlic if using.(see notes) saute till raw smell goes.
- Add the ground masala paste. Cook for sometime.
- Add sambar powder, salt, turmeric powder and mix well.
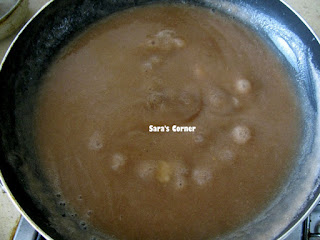
- Add tamarind water, allow to boil and get it thick. lower the flame.
- Check on salt, spicy and finally add jaggery.
- It will become thick kolambu.

Allow to cool and transfer to a clean vessel or bottle. Can store in fridge for 1 week.

Karuvepilai Kulambu is ready. Serve with hot rice.😋

Notes - Garlic if adding can add 1/2 while grinding and 1/2 for seasoning so it will be Poondu Karuvepillai kulambu.😋😋

PS - Your feedback is appreciated. Do try recipe from (http://www.sarascorner.net/take a picture and send it to me through Facebook message or mail me at simplysara07@gmail.com. Will be glad to add in my page Tried & Tasted album on FB or post on my page. Do follow me on Instagram id - saraswathiyer for more food stories and recipe ideas.Thank you.

Monday, April 24, 2017

Varagu | Kodo Millet Adai | Breakfast Recipes!

Varagu Adai is really healthy and great to substitute rice with millets. I have been trying to include millets in my cooking mostly in my breakfast and tiffin. This was very tasty and delicious. Do try and enjoy.


Ingredients
Varagu/Kodo millet - 2 cups
Channa Dal - 1 cup
Toor dal - 1 cup
Urad dal - 1 tblspn
Peppercorn - 10 nos(according to taste)
Dry red chilli - 5 nos
Curry leaves - few
Ginger - a small piece(optional)
Asafotida - 1/2 tspn
chopped Onion - (optional)
Salt

Preparation method
Wash, rinse and soak all ingredients except salt for 2-3 hrs.
Then grind with salt to coarse batter with water.
Heat a skillet/tawa and can prepare adai like dosas immediately or can rest the batter for 1/2-1 hour and make too.
Drizzle some gingely oil and cook both sides until crispy.

Serve with any of them chutney /molagai podi / Aviyal/Jaggery/Curd.

Instant Adai

You can grind all the ingredients to coarse/fine powder store it and prepare dosa by just adding water anytime.

Relish the Adai!

PS - Your feedback is appreciated. Do try recipe from (http://www.sarascorner.net/) take picture and send it to me through Facebook message or mail me at simplysara07@gmail.com. Will be glad to add in my page Tried & Tasted album on FB or post on my page. Thank you.

Friday, June 6, 2014

Cauliflower Soup | Baby and Toddler Food | Winter Special! No oil no butter no onion no garlic

Today I prepared Cauliflower soup for my kids at lunch. School holidays started and preparing something different to the kid.  I had a medium sized flower, thought of preparing Gobi manchurian or Gobi65 but since it started raining heavily my plan changed to soup. A low fat soup with no oil no butter no onion no garlic.

Both my kids loved:-) The 14 month was more interested in trying out the new dish.


Ingredients
Cauliflower - 1 medium size
Milk - 1/2 cup
Water as reqd
Pepper powder - 1/2 tspn
chopped Spring onion - 1 tblspn
Turmeric - a pinch
Salt - 1/4 tspn

Preparation method
Wash, remove stem and wash florets.
Boil water with salt and turmeric. Put the cauli florets and boil.
Off the stove. Allow it to cool a bit.
Grind to fine puree in a blender or mixie.
Pour in the same pot, add milk, salt, pepper powder, water if reqd, spring onion and boil it.

Serve hot as it is or with crouton or Bruchettas.

In the pic I have added Italian seasoning on top:-)

Notes - You can add onion, garlic, or fried onions to enhance the taste.

#lowfat #soup #nooil #nobutter #noonion #nogarlic #vegetarian

Wednesday, May 21, 2014

Banana Nutella Milkshake | Summer Specials | Kids

This is a simple and easy milkshake. Kids will definitely love it.


Ingredients
Nutella - 1 tblspn
Banana - 1 no
Sugar - 1 tspn(Optional)
Chilled Milk - 1 glass 
Ice cubes optional

In a blender blend everything until smooth. Transfer to a glass.

Serve with ice cubes or cold.

Delicious refreshing Banana Nutella Milkshake is ready to drink. Serve immediately.

Notes - 
- Dont keep it for long time finish in a day or refridgerate.
- Adjust sugar accordingly.
- Can replace cocoa powder in place of nutella.

Sunday, June 30, 2013

Veggie Wrap | Mexican Wrap Indian Style !

After posting Tacos recipe, next week hubby wanted to eat wrap and bought me all ingredients. My parents really enjoyed the wrap for the first time:-)


Ingredients
Tortilla - 8 nos(store bought wrap) I got Old Elpaso from Giant
Capsicum -  all colours 1no each
Onion - 1 no
Garlic - 1 tblspn
Cherry tomato - 15 nos/1 box
pav bhaji masala - 1 tspn
garam masala - 1/2 tspn
Olive oil - 1 tblspn
Lettuce or Chinese Cabbage - few leaves
Salt

Preparation Method
Cut all the vegetables to thin slices.
Heat a pan, add oil, add garlic, sauté for a min. Add onion and sauté till transparent. Add tomatoes
Add capsicum and sauté till its done.
sprinkle salt.

Off the stove.

Now take a tortilla spread one cabbage spread the veggie in the center. You can also top with cheese.


Roll and enjoy.

Notes - You can also put some salad dressing or tomato sauce.

Friday, May 24, 2013

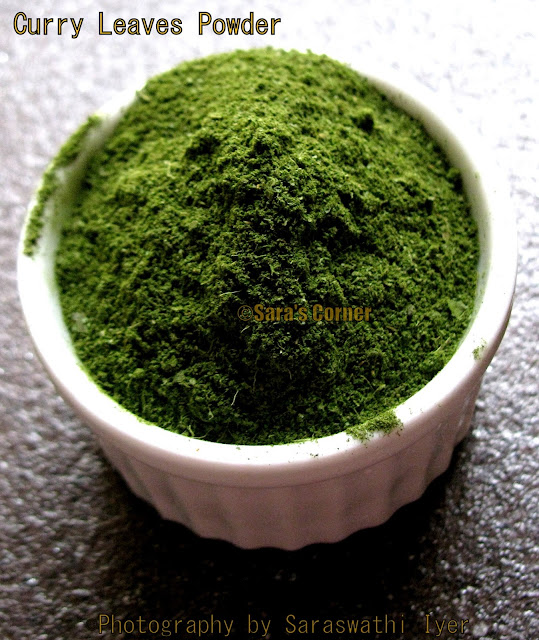
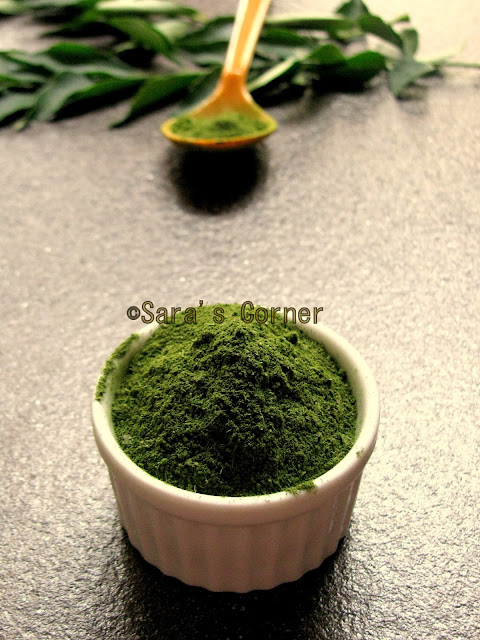
Karuvepilai Podi | Curry Leaves Powder | How to make!

Its difficult to blog after post natal, taking care of both the babies is quite interesting and busy. since Amma and Appa is here to help me, I am posting quite a few recipes.

This is a post for Non Karuvepilai/curry leaves lovers.
Curry leaves is very healthy and rich in Iron. This also gives good aroma to the dish.

Most of the people/kids throw if found in food. Sometimes it gets spoilt keeping in fridge for long time. You can make large batches and reserve few. Making these still has the natural aroma and is flavourful.

Today,I had posted a question on my Facebook page check it out here. Thanks to my friends found interesting answers.

So here is a simple solution for this.


Method

Take Bunches of karuvepillai/curry leaves sprigs.

Wash curry leaves sprigs and pat dry it.

Spread them on a white cotton cloth or news paper.

Keep it in sun or under shade until all water is dried.

If its under good sun, remove stem and grind the leaves to fine powder in mixie.

In abroad if you cant put under sun, wipe them remove leaves dry roast the leaves in a kadai. Cool it and grind to fine powder.


Store in air tight container and use it in your cooking.

PS - You can reserve some fresh leaves.

We can feed Curry leaves to our kids :)

Checkout Recipe for Spicy Curry Leaves Powder here.

Sunday, February 17, 2013

Green Dosa | Crepes | Savory Pancake! Healthy Breakfast!

I prepared this dosa for dinner yesterday, wanted to do Andhra Pesarattu but tried different combination. I have already posted Green Gram Adai here.


Ingredients
Green Gram - 2 cups
Curry leaves - 3 sprigs
Green Chilli - 4 nos(As per your taste)
Channa Dal - 1 tspn
Rice - 1 tspn
Urad dal - 1 tspn
Ginger - 1 inch
Onion - 1 no sliced
Capsicum optional
Salt


Preparation Method
Soak green gram, dals and rice for about 2 to 3 hrs in hot water/normal water.
Drain the water and grind with curry leaves, ginger, g chilli and salt to fine batter.
Take to a bowl/vessel add chopped onions and capsicum. Mix well and leave it out for 1 hour. Check for salt.
Heat a skillet/tawa and pour one laddle of batter and spread like dosa.
Put 1 tspn oil and cook both sides till brown.

Serve hot with any chutney or gravy.

I served it with Aviyal which was prepared in the morning.

Notes - You can also grind only green gram.
Adding of capsicum is optional, its tasty with just onions too.
You can also add coriander and mint leaves. I ran out of it, but loved the curry leaves flavour.

You may also like these recipes
Traditional Adai
Green Gram Adai
Andhra Pesarattu

Monday, February 4, 2013

Kollu Rasam/Horsegram Soup | Healthy Soup!


Kollu Rasam /Horsegram Soup is a very healthy dish or to mix with steamed rice. Checkout my previous post for Kollu Sundal here.


Ingredients
Kolluthanni/Water - 3 to 4 cups(As you get while steaming the kollu/horsegram for sundal)
Garlic - 2 nos(Optional)
Whole Black Pepper - 1 tblspn(As per your taste)
Jeera - 2 tspns
Tamarind water - 1 cup
Tomato - 1/2 no

Seasoning/Talipu
Oil - 1 tspn
Ghee - 1/4 tspn
Mustard - 1/4 tspn
Asafotida - a pinch
Dry Red chilli - 1no
Curry leaves few
Salt as required


Preparation Method
In a vessel add tamarind water and chopped tomato, salt and cook till tomatoes are soft.
Now add the water you to got from steaming kollu. If you wish you can also strain it once.
In a blender, garlic, jeera and pepper Grind it to fine powder.
Add this powder to the water and mix well. Add more water if required.

Once the raw smell is gone. off the stove.

Heat a pan with oil/ghee and season it mustard, asafotida, dry red chilli and curry leaves.


Kollu/Horsegram Rasam Soup is ready to serve. Enjoy it with steamed rice and Kollu Sundal.

Notes - You can also add some steamed Kollu/Horsegram to it.
Also can skip adding garlic if you do not wish.

Friday, November 30, 2012

Ragi Mudde / Finger Millet Balls from Mom's Kitchen

In my previous post I had mentioned about Ragi Mudde. It is very healthy and filling. This is the staple food of farmers in villages.

We prepare this weekly once at home as its good for health. Today my mom and me prepared this.


Ingredients
Ragi flour - 2 cups
Warm water - as required
Oil - 2 tspns
Cooked/steamed rice - 1/2 cup
Salt 

Preparation Method
Heat 2 to 3 cups of water in a vessel. Remove some water and keep aside. Add cooked red rice about 1/2 cup. Add oil. Add the flour to it and add salt. let it cook for 20 mins. Then stir continuously with a ladle or a wooden stick which is usually used until the flour absorbs all the water. Remove from the fire allow it to cool a bit and mix again for form a soft dough.

Then take little bit by hand and make small balls using water.

Ragi Mudde is ready to serve.

How to eat this - Take small portion and dip in sambar and swallow it. Do not bite or chew.

This can be served with Avarekalu Saru or Onion Sambar.

Wednesday, July 4, 2012

Soya Paneer Vegetable Pulao and Enrico's Soyamate Product Review!

Today I am sharing a recipe and about a Product Soyamate. When I received a pack for the review, I accepted as this is very healthy. Thanks #enrico.


Enrico's Soyamate is produced by a special process, made from Soya Flour by extrusion process and cut into chunks. These are dried, made free from fines and hygeinically packed. SOYAMATE is an ideal family food/100% vegetarian/ rich in protein, vitamins and minerals, easy to prepare. Soyamate is rich in high quality vegetable protein, packed with natural vitamins and minerals.Its PROTEIN content is over 52%, which provides nutrition no staple food can match. 250gms Soyamate nas as much protein as 1 kg. mutton or 3.9 litres milk or 24 eggs. This is available in Malaysia. So when you are out to Malaysia, don't forget to buy.

Source: Soyamate Page on FB - Soyamate.

Soyamate Soya chunk is very good and tasted great. I was not big fan of soya and now after tasting, planning to include in my diet.


When I was going to prepare Soyamate Soya Veggie Pulav, added paneer, as my son loves paneer in all dishes.

Ingredients
Basmati Rice - 2 cups
Diabetic Basmati Rice - 1 cup

Carrot - 1no
French Beans - 20 nos
Green Peas - 1 cup
Soya chunks/Meal maker - 2 cups
Paneer cubes - 1 cup (Optional)
Spices - 2nos each cloves, cardamom, cinamom, bay leaf
Garam Masala - 1 tablespoon
Channa Masala - 1/2 tablespoon
Red Chilli powder - 1 tablespoon (Adjust according to your taste)
Turmeric powder - 1/4 tspn
Water - 4 cups
Milk - 1/2 cup
Oil - 2 tablespoons
Ghee/Butter - 1 tspn(optional)
Jeera - 1 tspn
Kasoori Methi - 1 tablespoon
Salt

To grind
Big onion - 1no
Ginger garlic -2" piece
spices - cloves, cardamom, cinamon, star anise.
Green Chilli - 3 nos (As per your taste)
Mint and coriander - 2 cups


Preparation Method
Wash, rinse and soak basmati rice in water.
Chop the vegetables to medium size cubes.
Soak soya chunks in hot water for few mins.
In a pressure cooker, add 1 tspn oil, spices, 1/2 onion, ginger, garlic, coriander and mint. Do not fry too much just fry until onions are transparant. Off the stove. Allow it to cool and grind to coarse paste.
Heat the same pressure cooker, with ghee and rest of the oil, bay leaf, add jeera, add chopped onion, the grounded paste, vegetables and allow it to boil once. Then add aneer and soya chunks.
Add the soaked basmati rice and mix well. Add water and milk.
Add turmeric powder, garam masala powder, channa masala, red chilli powder, salt, kasoori methi and mix well.
Let it boil once, then close the lid and pressure cook for 3 whistles.


Delicious Soya Paneer Vegetable Pulao is ready to serve. Serve with Tomato Raitha.


This recipe is going to Cooking with Love Uncle event hosted by me.


Notes - You can add your choice of vegetables.

Friday, May 4, 2012

Samba Rava | Broken Wheat and Nuts Ladoo | Two methods!!!

Samba Rava /Broken Wheat and nuts ladoo is a healthy ladoo. Once I started preparing the Samba Rava Kanji health mix and my mother in law told me to do the ladoo too. I have been preparing every month and its my son's favourite one too.


Method 1
Ingredients
Samba Rava/Broken Wheat/Dalia - 2 cups
Sugar - 1 cup(If you want you can reduce or increase)
Pottukadalai/Fried Gram -  1 cup
Badam, Pista, Cashews - few
Elakka podi/Cardamom powder - 1/4 tspn or 4 nos
Ghee - as reqd.
Nuts - I have used little cashews, more of badam and pistachos.


Preparation Method
In a kadai, dry roast samba rava, pottukadalai, and nuts to slight brown separately.
Slightly roast the nuts too.
Allow it to cool.
Grind to fine powder in mixie with sugar.
Melt the ghee in a pan and slowly mix to the powder and make medium size balls.

Healthy Samba Rawa Ladoo is ready. Enjoy with Coffee/Tea.


Method 2
With the same above ingredients add milk and less ghee. Follow the same procedure to make ladoos. But the shelf life will be less.


Store it in an air tight container and refridgerate it.

Friday, April 27, 2012

Oats Buttermilk | Summer Specials!

Oats Buttermilk is very healthy and refreshing for this scorching summer.


Ingredients
Rolled Oats - 2 tspns
Ginger - 1" piece
Curds/Plain Yogurt - 1 cup
Water - 2 cups
Salt

Preparation Method


Soak rolled oats in water for few mins.
In a blender, add oats, a piece of ginger and salt. Grind to smooth paste.
Take chill thick curds/plain yogurt add 2 cups water. Mix the smooth paste with curds, mix well and garnish with chopped coriander.

Serve chilled.

Enjoy Oats Buttermilk.


   This recipe is going to CWS Oats Event by Kalyani and Priya and Summer Spunk by Anusha.

Monday, April 23, 2012

Homemade Mixed Fruit Jam | Step-by-Step Recipe Type 1!

Homemade Mixed Fruit Jam is a simple and delicious spread mix of fruits. I never thought would be making jam at home:) but when I was talking to my friend Rekha about it she told me a simple recipe for the jam. I have slightly changed the recipe, it tasted delicious. Kids will surely love!

Step by Step Pictorial Recipe


Soak agar agar strands in water.


Wash, remove skin, seeds and chop all the fruits into  chunks.

Heat a non stick pan, put the soaked agar agar with 1/2 cup water in low flame. Allow it to dissolve.

Grind all the fruits to smooth paste.


When the agar agar is fully dissolved, add the grounded fruit mixture into this and mix well.

When you feel the raw smell is gone add sugar and stir.

Mix and keep stirring

It will be in liquid consistency

 Remove the paste from sides and keep stirring till its bubbling up and thick.


Off the stove. Add the vinegar.


When its thick and finally looks shiny

Ingredients
Strawberry - 6 nos
Apple - 1no
Banana - 2nos
Guava(white) - 1 no
Brown sugar - 1 cup(As per your taste)
Vinegar - 1/2 tspn
Agar Agar/China Grass - few strands
Preparation Method
Soak agar agar strands in water.
Wash, remove skin, seeds and chop all the fruits into  chunks.
Heat a non stick pan, put the soaked agar agar with 1/2 cup water in low flame. Allow it to dissolve.
Grind all the fruits to smooth paste.
When the agar agar is fully dissolved, add the grounded fruit mixture into this and mix well. Keep stirring.
When you feel the raw smell is gone add sugar and stir. It will be in liquid consistency, keep stirring until its thick.
Remove the paste from sides and keep stirring till its bubbling up.
Off the stove. Add the vinegar.
Mix and allow it to cool.
It will become thick  jam.
Store in air tight container and use with your bread.


Delicious homemade mixed fruit jam is ready to serve.


  The next day served with Wholemeal Bread/Toast. Enjoyed.


PS - Your feedback is appreciated. Do try recipe from (http://www.sarascorner.net/) take picture and send it to me through Facebook message or mail me at simplysara07@gmail.com. Will be glad to add in my page Tried & Tasted album on FB or post on my page.

This recipe is going to Kalyani's Event Pickles and Preserve Fest and Spring Seasonal Food Event by Sravani.

Friday, April 13, 2012

Tofu Butter Masala ! Lunch Box Special!

Tofu is very healthy since its prepared from Soy Milk. I have been using Tofu rarely at home. This can also be prepared for lunch box with chapathis. I love chapathis for lunch or anytime:-) I have already posted Tofu Masala here and this is with slight variation.


Serves 2 persons
Ingredients
Pressed/Firm Tofu - 1 pkt
Onion - 1no
Tomato - 1 no
Ginger n Garlic - 1/2 tspn
Spices - 1 no cardamom/elachi, cloves/laung, cinamon/pattai/1 bay leaf
Coriander leaves - few sprigs
Dhaniya powder - 1 tablespoon
Red chilli Powder - 1/2 tspn(As per your taste)
Turmeric powder - a pinch
Milk - 1/2 cup
Tomato puree - 1 tablespoon
Kasoori Methi - a pinch
Olive Oil - 1/2 tspn
Butter - 1/2 tspn
Cashews - 4 nos
Salt

Preparation Method
Chop onion and tomato into small pieces.
Grind Onion, tomato, ginger garlic, cashews, turmeric powder, dhaniya powder, spices, red chilli powder, coriander leaves in a blender or mixer into fine paste with little water.
Heat a Kadai/wok, add butter, oil and just toss the tofu pieces and keep aside. 
In the same kadai,add little oil, add the grounded mixture, tomato puree and allow it to boil. Once the raw smell goes.(if reqd you can add in whole spices too at this time in oil)
Add salt, kasoori methi and mix well.
Add milk and mix. When its going to be thick gravy.
Cut tofu into small pieces and add it. Just boil once and off the stove.
Garnish with crushed kasoori methi or chopped coriander leaves.
Top it with 1/2 tspn of butter.

Tofu Butter Masala is ready to pack to your lunch box with chapathis or rotis.

Headlines

Sara's Corner
Blog Widget by LinkWithin
d

Click here

Click here
Join
Top Food Blogs
Top Food Blogs

Join Sara's Corner at

Infolinks 2012
Sara's Corner reserves copyright of this blog. Do not copy or use information, text, images without permission of the owner.

google.com, pub-7557486609431298, DIRECT, f08c47fec0942fa0
SARA'S CORNER Copyright © 2009 Blogger Template Designed by Bie Blogger Template